
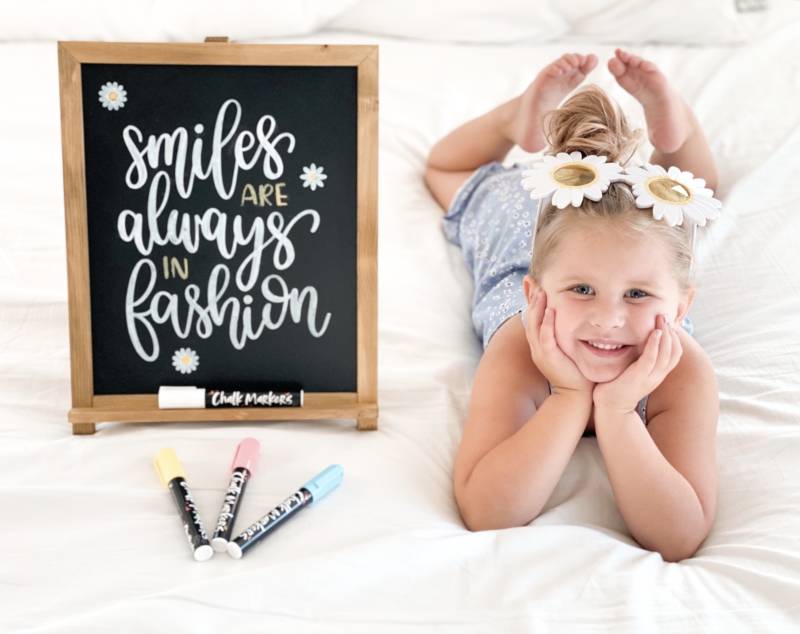
There’s something about a chalkboard that just gives me all the feels. They’re perfect for parties and pictures. I’m dreaming of using our chalkboard for a lemonade stand menu soon! Chalkola seriously has the best chalkboard markers that make it SO fun to do all the chalk art! Especially with homeschool on the table again this year, I’m excited to use them for alternative learning strategies. I will link them here for you! Also make sure you use the code KATELYN10 on their website or code CHALKOLA10 on amazon to save you 10% on your order!
Disclaimer: This post is in partnership with Craftola
When I posted on instagram in collaboration with Chalkola, so many of you commented on my “perfect penmanship”. But I have a secret….. My handwriting actually isn’t that great (unless you’re asking a 12 year old girl. Then she may say otherwise). Learning calligraphy is on my bucket list but for now I’ll take the easy way out & today I’m going to show you how too! Using your Cricut air explore 2 or Cricut maker and dollar store contact paper. Yup I said it, THE DOLLAR STORE.
What you’ll need
- Chalkboard Markers
- Cricut air explore 2
- Patterned contact paper
- Transfer tape
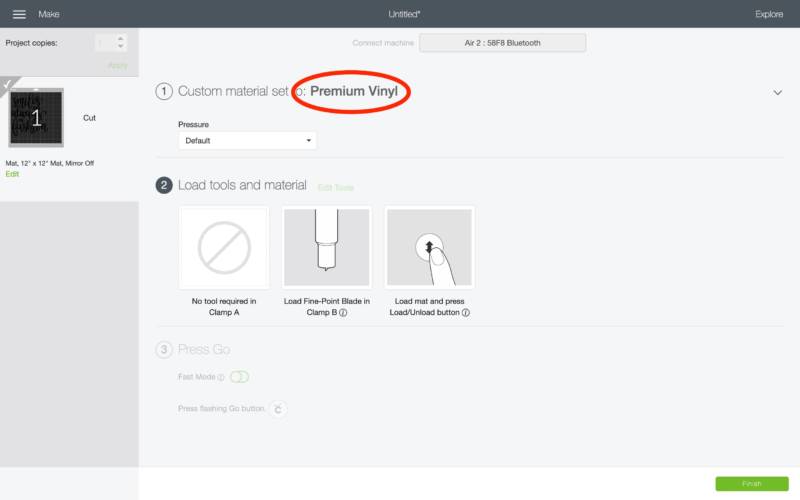
The first thing you’ll want to do is create or upload your design in Design Space. I uploaded this specific design from LoveSVG.com
Then weld your design together (if your design is multiple colors this will turn it into one color on design space which is what you want so it cuts all together)

Measure and cut your contact paper accordingly and place on your mat with the liner on the back. Make sure you’re using patterned contact paper! I tried using the clear kind and failed 4 times using different strategies. When I used the patterned kind it worked on the first try. So don’t do what I did. HA

There isn’t a setting for contact paper but the vinyl setting worked perfect! So make sure you check your settings before hitting “make it”
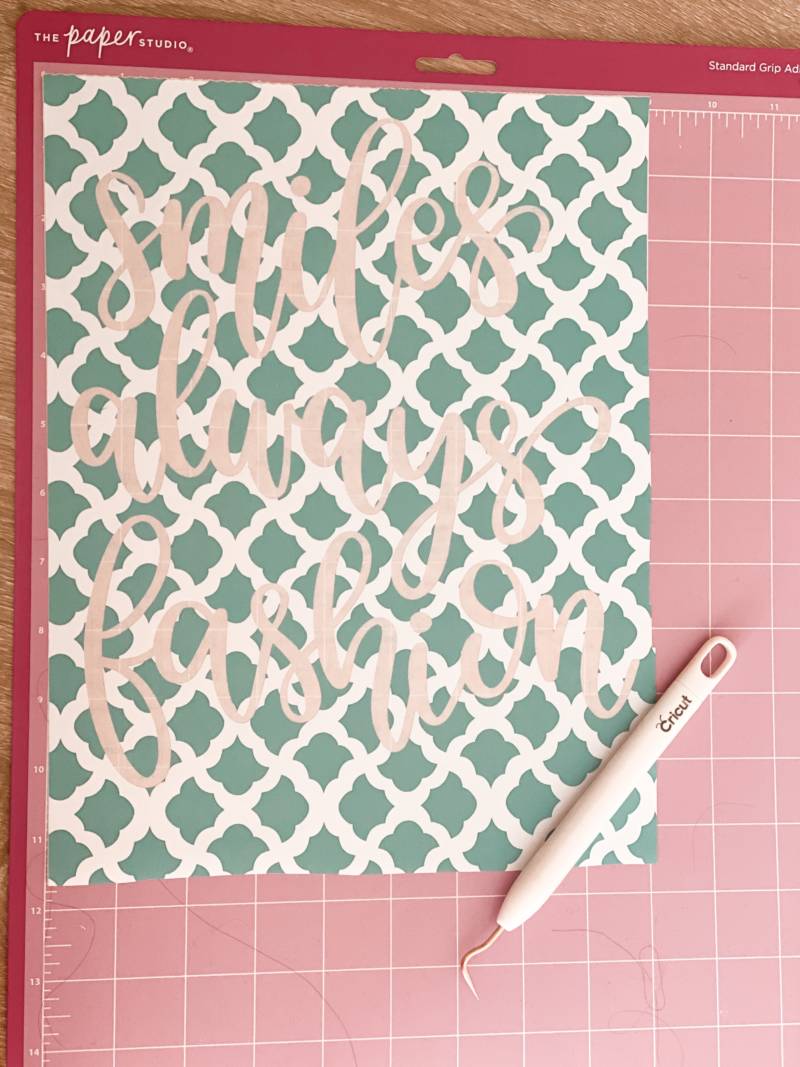
Now that your design is cut you want to reverse weed it. Which means you weed out all the wording and keep the extras around. This creates your stencil. Be careful and make sure you don’t weed out the insides to some letters. For example the inside of the “e” or “o”
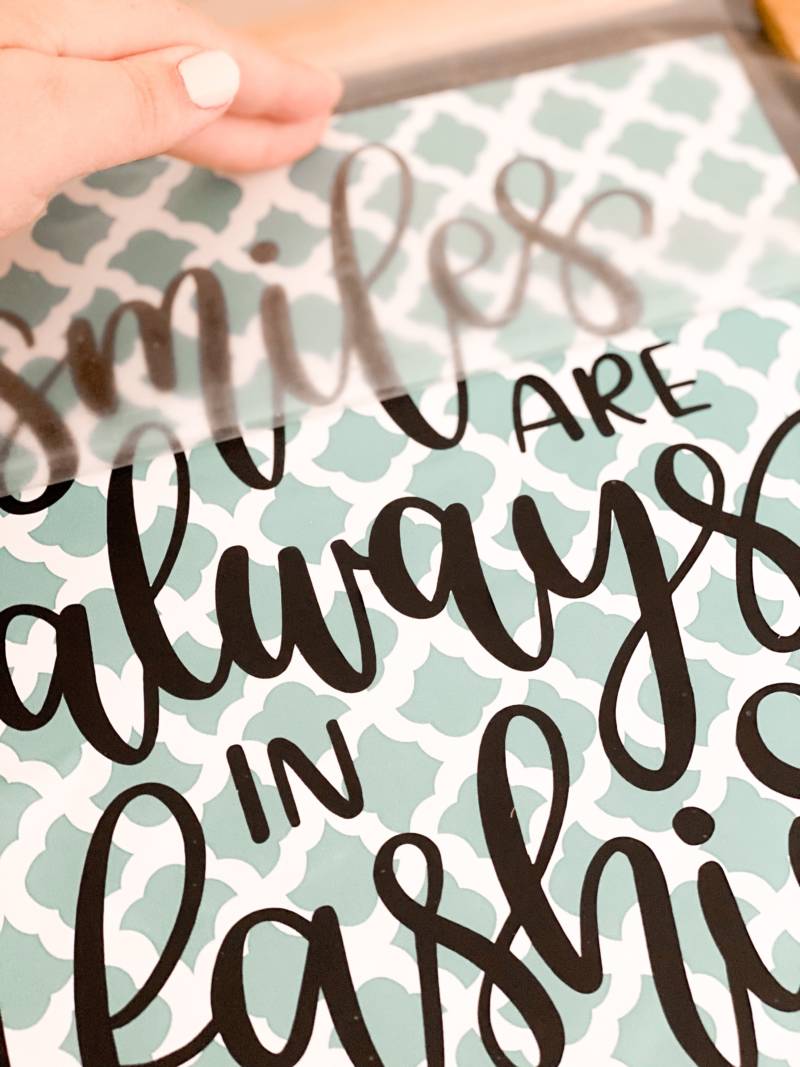
After you’ve weeded your design apply transfer tape just like you would regular vinyl and transfer it to your chalkboard.
Remove the transfer tape and start filling in the stencil with your Chalk Markers!

Make sure your design is completely dry before removing the stencil so it doesn’t smear.

There you have it! A cheat sheet to making the perfect chalkboard!


Thank you to Chalkola for gifting us these awesome products! We love them so much and I know you will too!
XO,
Katelyn

